Categories
- Wire & Cable
- Multi-conductor & Signal Cable
- Battery Cable Assemblies
- Terminals and Connectors
- Electrical Parts
- Electrical Tools
- ID Products
- Wire Management
- Tape & Sealant
- Mounting Panels & Panel Blanks

Need Help?
Click HereGet a Business Account
Apply HereEtched Switch Covers

What are Etched switch covers?
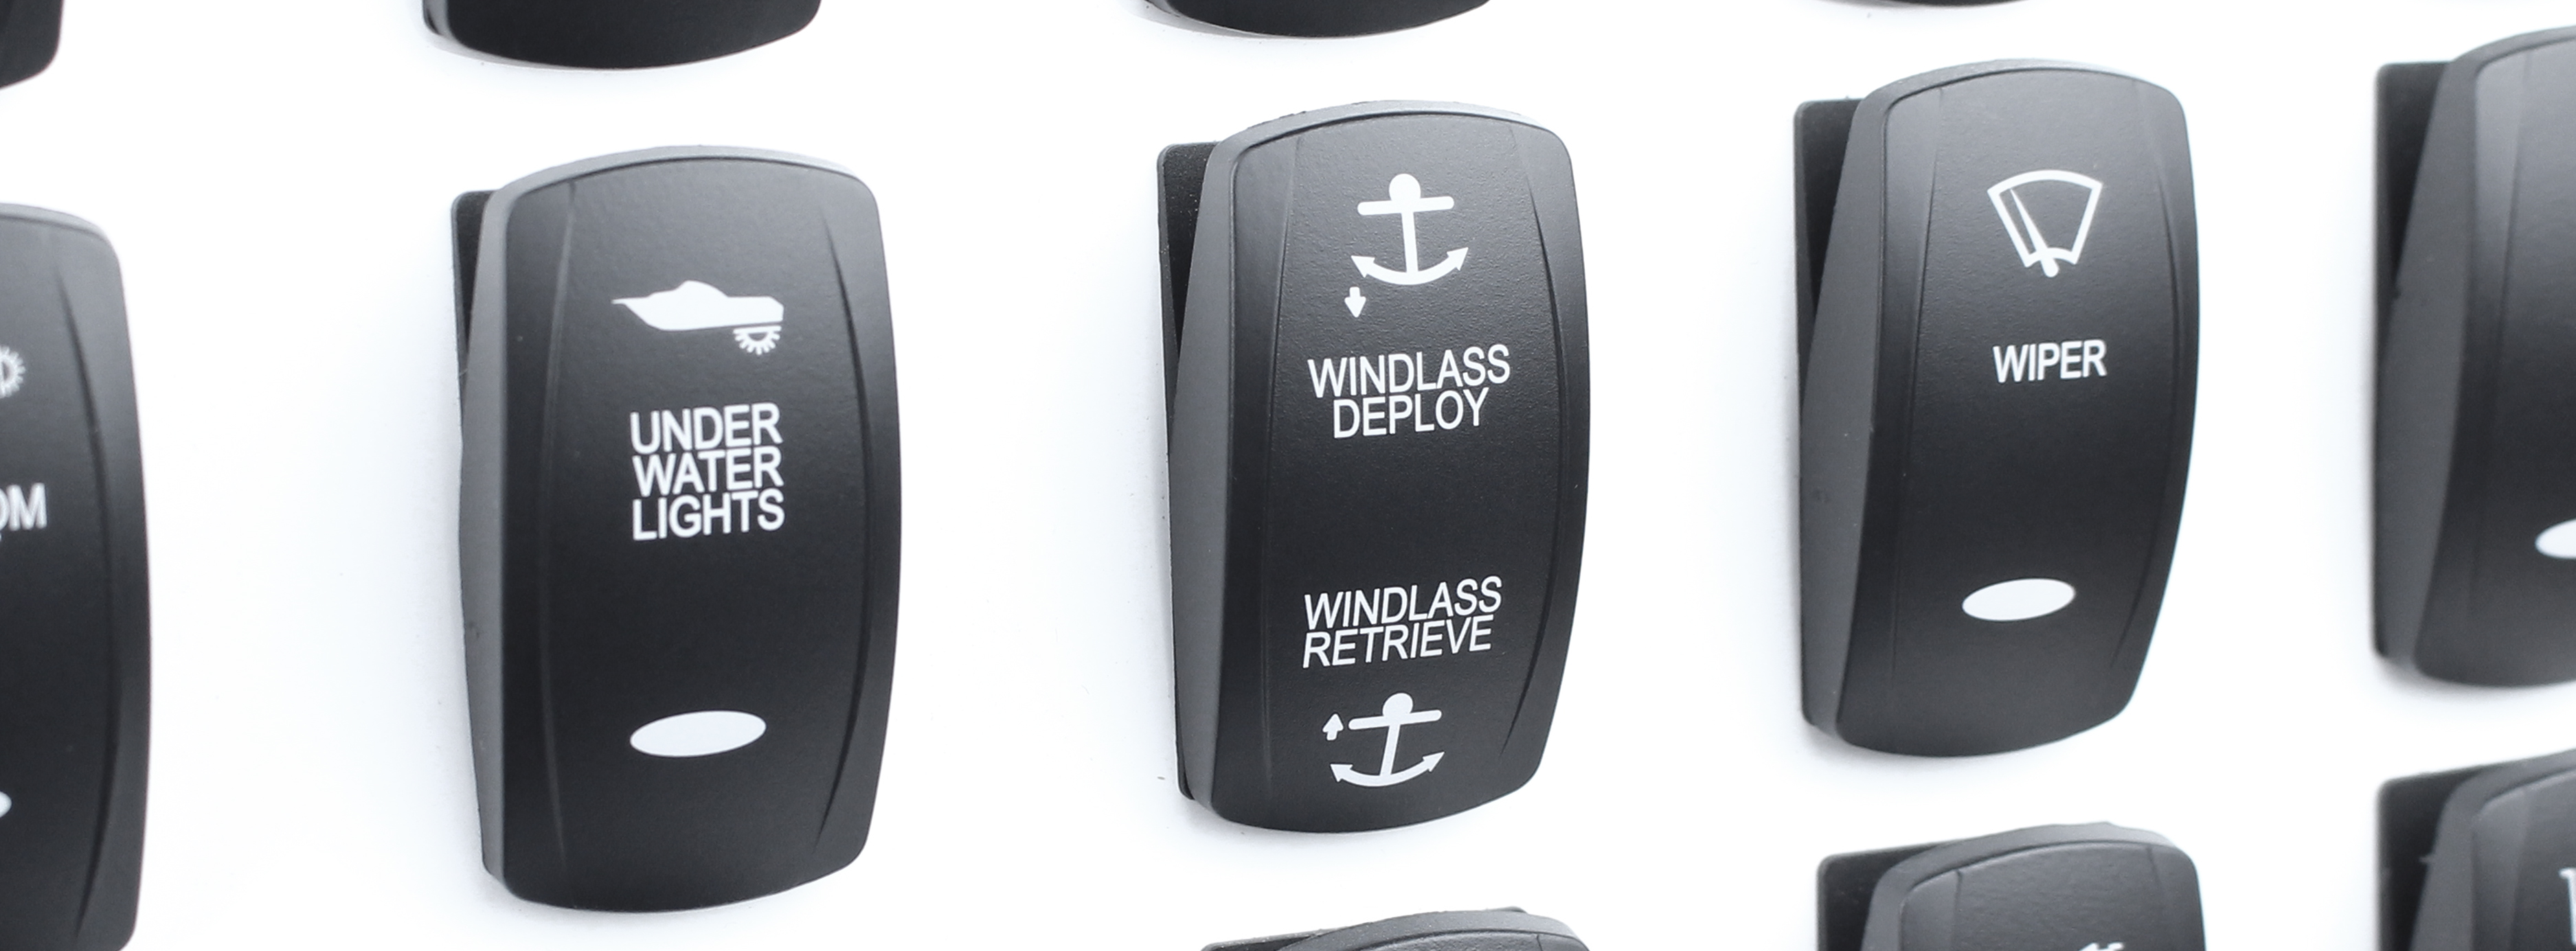
Etched switch covers are durable identifying switch covers that have been precisely laser etched giving an unmistakably clean, professional appearance. They are used with rocker switches and are commonly found on marine vessels although they can be used anywhere rocker switches are used to activate and deactivate electronic equipment. Not only do they make visual identification of a switches function a simple task, they enhance the visual quality of the panel or piece of equipment as well. You currently have the ability to choose from 225 different options when selecting your etched switch covers. Our switch covers are known for their high degree of durability and longevity meaning that they outlast other types of switch covers. Additionally, they are known for their ease of installation. It literally takes about three seconds to install an etched switch cover.
Frequently Asked Questions
How long do Laser Etched Switch Cover take to produce?
This custom product usually ships within 5 business days. Please allow this time for processing. This product is made to order, and cannot be returned or refunded.
What makes these different from other switch covers?
Our laser etched switch covers are made from a white plastic that enhances its light visibility and is then coated in a specialized black etchable coating.
What body shape are these switch covers?
Our laser etched switch covers are part of the V series and are the same size as other V switch covers.
What if your looking for BLANK switch covers?
We offer two distinct types of blank switch covers. The first is the same material as the laser etched just without any decoration. The other type is Contura series III Blank switch covers which you can find here.
How much space do I need between switch bodies?

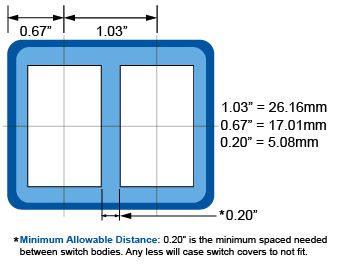
In order for etched switch covers to properly fit side by side, you will need to understand the diagram shown here. Basically, you will need a MINIMUM of 0.20" between the inner edges of the switch body cutouts.
So you can either measure from inner edge of a cutout to the inner edge of the next cutout, or you can measure from the center of a cutout to the center of the next cutout. If you measure from center to center, the distance would need to be no less than 1.03"
Do I want One Bulb Illumination or Two Bulb Illumination?
Whether you want one bulb or two depends on the switches function and application. Nearly all of our switch covers are available in either one lens or two lenses however, several of our switch covers are multi-function meaning that they can only be used with two bulb switches. The main thing to consider is whether the switch itself is on-off, or if it is more complex. If it is simply on-off, then a single bulb switch cover may be what you are looking for. If the switch is more complex, you will likely want to consider using a two bulb switch and two lens switch cover.
Where are these products implemented?
Laser etched switch covers are implemented in applications where a switch's function needs to be quickly and easily identifiable. They are built to used in new installations as well as when replacing parts. Let's say that you have faded switch covers or damaged switch covers, then our laser etched switch covers are ideal for your needs. They are simple to install. All you will need are the correct switch bodies and the right switch cover removal tool. Now that we have covered the basics, let us look at what options are available.
Accessory / Misc.
Electronics
Engine
Fuel
Lights
Pumps / Bilge
Trim / Wiper
Vent / Hatch
*This Page was Updated on 1/21/2025.*


