Advantages of Heat Shrink Terminals
Posted by Pacer on 24th Mar 2025

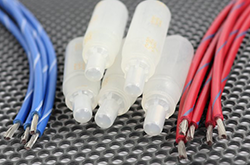
Heat shrink terminals are electrical connectors designed to create solid, secure, and insulated weatherproof connections between wires. They commonly consist of a connector surrounded by a heat-shrinkable tubing that has an internal adhesive lining. When heated, the tubing shrinks, and the adhesive melts, forming a tight seal that protects against moisture, corrosion, and mechanical stress.
They are the ideal solution for marine applications where moisture intrusion and corrosion resistance are required for secure electrical connections.
What advantages do Heat Shrink Terminals offer over other types of insulation?
Moisture resistant
With other types of insulation such as nylon or vinyl, the connection does not get a watertight seal to protect the connection point. That is not to say that nylon, vinyl and non-insulated terminals are ineffective. They are useful connectors for the right applications, however, they all fail to offer the level of protection sealed heat shrink terminals offer.
High durability
Heat shrink terminals offer a high level of durability such as protection from water, condensation, salt spray, corrosion, and vibration. Few other terminals can be held to that claim. Additionally, heat shrink terminals provide strain relief adding to the life of the electrical connection. The bottom line is that heat shrink terminals are extremely durable regardless of the environment where they are used.
Versatility of applications
There are not many terminals that can be used in just about any application. Heat shrink terminals, however, can boast that claim. Being designed for the marine environment means that they must be highly resistant, durable, and versatile. Heat shrink terminals sealed connection point and high-level durable give them the versatility needed to perform in just about any application.
Longevity in tough conditions
Being able to handle tough conditions is one thing, but doing that for multiple years on end, is something more. Heat shrink terminals are some of the longest lasting terminals available for marine applications. Long after other types of terminals have failed and been replaced, heat shrink terminals will still be performing. It is this longevity that makes them so ubiquitous in marine applications.
Corrosion Resistance
Marine environments are notorious for promoting corrosion as metals are exposed to seawater, which we all know is heavy with salt. The epoxy coating of heat shrink terminals protects metal connectors inside the terminal body from the corrosive effects of saltwater and other environmental factors, extending the lifespan of your electrical connections.
Strong Insulation
Epoxy-lined heat shrink terminals provide an additional layer of insulation that protects the electrical connection from the intrusion of external elements like dirt, dust, debris, seawater, and other contaminants. The glue serves to create a potent barrier. This insulation helps maintain the integrity of your electrical systems and prevents short circuits caused by environmental contaminants.
Improved Electrical Performance

With the added waterproof and corrosion-resistant qualities, your electrical systems will maintain their performance even in tough environmental conditions. The epoxy seal helps ensure that the electrical connections remain clean and free from moisture or contaminants that could cause issues like voltage drops, corrosion, or short circuits.
Ease of Use
Heat shrink terminals are designed for easy installation, often requiring the proper crimp on the barrel of the terminal and the heat shrink to be activated securing the connection. The epoxy lining melts and bonds tightly to the wire. This ensures that the terminal is sealed and secure in just a few simple steps. In fact, many boaters carry extra heat shrink terminals in case of an issue while on water.
What types of Heat Shrink Terminals are Available?
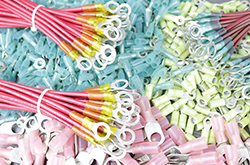
Rings
Ring terminals are used to connect wires to a connection point by fitting the open face of the terminal over a stud.
These wire connectors create a solid connection as the ring that is fitted over the stud cannot come loose or fall off. These types of crimp connectors are built for long-term use. They are widely known for the semi-permanent connections that they create.
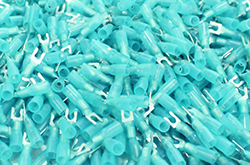
Forks
Fork Terminals refer to types of crimp connectors that are used to attach a wire or wires to a stud, bus bar, or another part of an electrical system.
A fork terminal is commonly used to help prevent frayed wires and offer a high level of protection. There are two main types of forks: flanged fork terminals and locking fork terminals. You can learn more about the differences between them here.
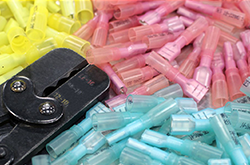
Disconnects
Disconnects are intended to be disconnected and reconnected multiple times hence, their name. This makes them ideal for use where field serviceability and longevity are application requirements.
They are commonly employed where routine maintenance is expected. Whether dealing with mechanical abuse, wire pull-out, or abrasion, they are a solid choice for long term conductivity.
Butt-splices
Butt splices are used to safely connect one or more wires to another wire. There are multiple styles of butt-splice to handle the needs of various applications.
Both sides of the butt-splice could be meant for the same wire gauge or meant for different wire gauges. In some instances, they are used to connect two or more smaller gauge wires to a single wire.
Wire joints
Wire joints are used to connect two or more wires together on one side of the terminal. The other side is closed off effectively creating a dead end. Each style of wire joint has a set range of wire sizes it will accept.
For example, the 22AWG – 16AWG is made to handle either four 22 AWG wires or two 16 AWG wires. It could even handle two 22 AWG wires and one 16 AWG wire.
What are the most common Wire Gauges?
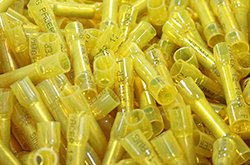
The most size heat shrink terminals work with wires ranging from 22AWG to 8AWG although there are smaller and less common varieties. The most common styles include 22AWG – 18AWG, 16AWG – 14AWG, 12AWG – 10AWG, and 8AWG. They are easy to visually identify based on not only their size, but their color as well. 22AWG – 18AWG and commonly pink or red, 16AWG – 14AWG are commonly blue, 12AWG – 10AWG are commonly yellow, and 8AWG are commonly pink or red. There are some instances where the size of the heat shrink terminal, and the color do not align but those connectors are generally uncommon.

22-18 AWG

16-14 AWG

12-10 AWG

8 AWG
What Tools are Required for to Properly Install Heat Shrink Terminals?
Although it varies from one type of terminal to the next, the operator will generally need a wire cutter/stripper, proper crimping tool, and heat gun or heat tool. The wire cutter gives a clean slice across the wire without excessive damage to the outer insulation or internal conductors. The wire stripper safely removes the outer insulation in order to access the internal conductors, the proper crimp tool ensures that the terminal receives the correct amount of pressure to bend the terminal body around the exposed internal conductors creating a solid electrical connection. To learn more about any of the various tools shown below, simply click on the image to be taken to a detailed product page.
What Steps should be followed for Correct Installation?
To properly install a heat shrink terminal some specific steps should be followed. After you have gathered the heat shrink terminals, wire or cable, and the proper tools, use the steps below as a basic guide. Each type of terminal may require different tools, but the steps should remain the same. For this example, we will be using a heat shrink ring terminal.
Step 1:
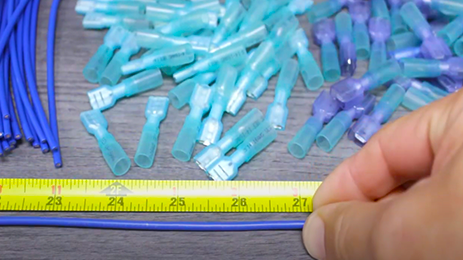
The first step is to measure the wire to the proper length and cut it using the wire cutter. It may be a good idea to add a few inches to the measurement as it is better to have your wire a little too long rather than too short. This ensures a clean cut without damage to the internal conductors.

Step 2:
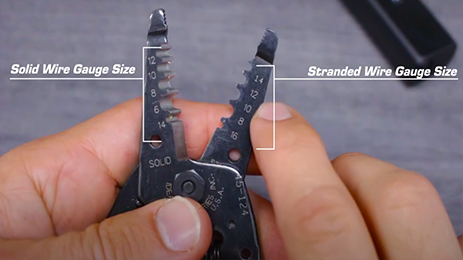
Once the wire has been measured and properly cut, the next step is to remove the outer insulation. To achieve this, use the wire stripper. Most wire strippers have what are known as strip nests. These bladed openings are based on the wire gauge so a 12AWG wire would go into the 12AWG -10AWG cut nest. The amount of insulation to remove will vary from terminal to terminal so make sure to measure. Once the wire is in the nest, simply close the tool and pull it away from the main body of the wire. This will remove the outer insulation without damaging the internal conductors.

Step 3:
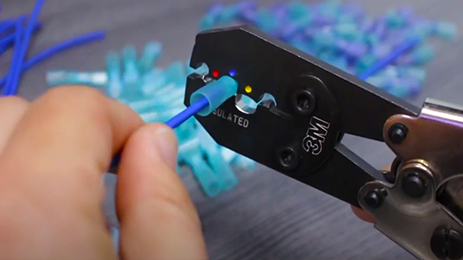
Place the newly stripped wire into the barrel of the heat shrink terminal. The end of the stripped wire should butt up to the indent in the center of the barrel while the insulation butts up to the insulation. This decreases the amount of exposed conductor material and ensures a solid connection. Now, using the crimp tool, place the terminal into the proper crimp nest. Crimp nests work the same way as cut nests so pay attention to the wire gauge and the size of the nest on the tool.

Step 4:
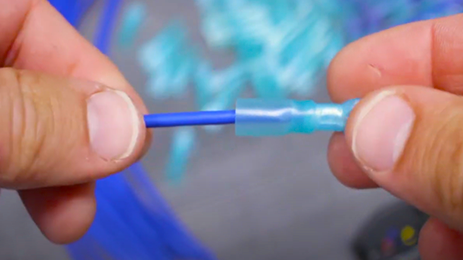
Perform a tug test. This is where you will grip both the wire and the terminal and gently pull them apart. If there is no give or movement at all, then move on to the next step. If, however, the wire pulls loose or changes depth at all, then the crimp was not properly secured. In this case you may need to start the process over and remove the improperly crimped terminal.

Step 5:
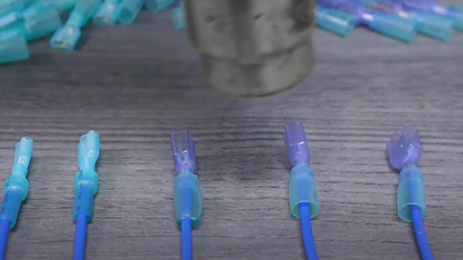
With the tug test complete, the final step is to activate the heat shrink. Using the heat gun, activate the heat shrink by moving the heat gun back and forth in slow, deliberate motions. Be sure to keep a safe distance away from the terminal body to remove the risk of accidental burning of the insulation. As the heat gun moves back and forth, the heat shrink will begin to constrict, forcing the adhesive lining outward. Once the heat shrink has completely reduced, turn off the heat gun, allow the connection to cool, and then visually verify the connection point.

Heat shrink terminals provide a range of benefits not found with other connectors. From high durability and environmental sealing to corrosion resistance and improved connections, they are a solid choice for electrical connections. With the versatility in styles and applications, they have become ubiquitous in multiple industries around the world. If you want to fully protect your electrical connections for the long haul, make sure that you use heat shrink terminals.

