How to Correctly Strip Marine Wire
Posted by Pacer on 20th Feb 2025

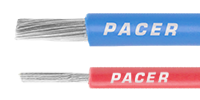
Correctly stripping wire is a simple task with the correct tools and knowledge. Issues arise when someone doesn't have one or both of those things. This short article aims to alleviate this by providing the reader with both the prerequisite knowledge and the types of tools needed to be successful in stripping wire.
What purpose does stripping wire serve?

Stripping wire serves to prepare electrical wires for termination, most likely with terminals and connectors. This can be anything from ring terminals or butt splices to pins, sockets, or dead ends. Wires are used to carry electrical signals, and the insulation surrounding the wire serves to protect the signal and anyone who comes into contact with the wire. To terminate the wire, the first step is to remove the insulation, which exposes the internal conductors.
What tools are required?
The two most common types of tools needed for stripping wire are wire cutters and wire strippers. Both tools perform the task their names give them. The wire cutter will give a clean, professional cut each time without any damage to the internal conductors. They achieve this by being compact enough to easily handle smaller gauge wire while offering high leverage. The wire stripper is designed with cut nests to handle various gauges of wire. This means they can cut from 20 AWG to 12 AWG wire, again, without damaging internal conductors. Here is the best part: there are tools known as wire cutters/strippers, which are designed to handle both tasks. With this one simple-to-use tool, the operator can both cleanly cut and strip wire.

What happens if I use the wrong tools?

The entire point of electrical wire is to carry a current, or signal, to another device. If you damage the internal conductors, that current-carrying ability is reduced, if not eliminated. Additionally, if damage occurs to the outer insulation, then the wire cannot properly protect the electrical signal. When the incorrect tools are employed, there is an increased chance that damage will occur to the internal conductors or insulation, reducing the efficacy of the wires current-carrying ability.
"When the incorrect tools are employed, there is an increased chance that damage will occur to the internal conductors or insulation."
What are the steps to correctly strip electrical wire?

Step 1:
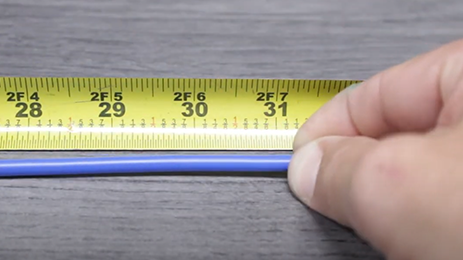
Begin by measuring the wire to the correct length and adding an extra inch or so. This ensures that your wire run will not be too tight. Having it a little too long is better than being a little too short. Be sure to consider how much insulation you will need to remove.
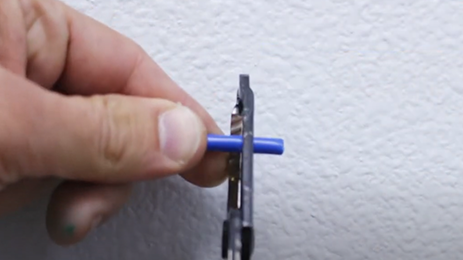
Now it is time to utilize our cutting/stripping tool. The compact wire cutter/stripper will cut through 10-gauge primary wire with little effort creating a clean cut. This cut will ensure that the insulation and internal conductors are not compromised.

Step 2:
Determine the correct amount of exposed conductor needed for the chosen connector. This will depend on the type of connector, but usually, you will need enough exposed wire to fully insert it into the barrel of the connector while butting the base of the barrel up to the insulation, leaving no gap.
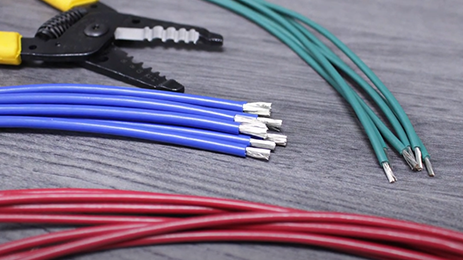
Once we know the correct amount of insulation to strip, we’ll use our tool to select the correct sized cut nest. Once in, we’ll close the tool, cutting through the insulation and pulling it away from the main section to reveal the internal conductor. All that is left is to repeat the process on any remaining wires.

Step 3:
Inspect the wire for damage to the internal conductors, ensuring that none of them have been severed or bitten into. Also inspect the insulation to ensure that there are no tears or rips.
If the insulation is compromised, you may need to either start over or cover the area with epoxy-lined heat shrink. As you can see, it is quite easy to properly strip primary wire with the proper tools so long as you pay attention to the most important part, the internal conductors.
Why is it important?
As stated above, wires are designed to carry current to another location, and when the internal conductors are damaged, that ability is reduced. This is why it is critical to ensure that, regardless of the tools you choose to use, you do not damage the internal conductors when stripping the insulation from electrical wire.
Additional Tools that could be used:
Aside from the tools mentioned above, there are several other convenient options available. We will briefly cover a few other tools you could use. Both tools below offer stainless steel construction, making them durable and rust-proof. This, in turn, makes them perfect for use in marine environments.
VT1000 - 6-in-1 Multi-Purpose Tool, 24 - 8 AWG
This tool strips and cuts 22-8 AWG solid and 24-10 AWG stranded marine wire. It can be used with insulated and non-insulated terminals and connectors. To make this tool even better, it shears and rethreads 24-10, 32-10, 32-8, 32-6, and 40-4 screws. It also cuts bolts and strips 22-8 AWG solid and 24-10 AWG stranded wire.
VT1010—Multi-Purpose Long-Nose Tool, 22-10 AWG
This tool is built to strip and cut 20-10 AWG solid and 22-12 AWG stranded wire. It also offers the ability to crimp insulated and non-insulated terminals and connectors. The long nose design is perfect for forming and looping wire and handling small parts. This tool can shear 24-10, 32-10, 32-8, 32-6, 40-5, and 40-4 screws.


